I am only search for 5 Minute, by it in 5 Minutes to and get ist in few ours! Best i found in the Internet and my Amplifer is repaired as well! Thank you
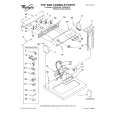
I found the manual to be clear concise and complete. It was of immense assistance when removing the unit as the unit was over 22 years old and the wiring diagram was unobtainable from the manufacturer. The exploded drawings were clear as were the instructions and labels.
Notes: 1. Column numbers match the physical arrangement of the columns on the print wheels. 2. Column numbers are assigned from 1 to 18 from the frame motor side. 3. Pin numbers are assigned from 1 to 27 from the frame motor side. 4. The spark arrestor diode is connected as shown below.
7
9
M
23
Motor power supply (+) Detector power supply (+) Timing signal Detector power supply (�)
8
10
24
Electromagnet (+)
Driver
9
11
25 26
10
12
(Example of compatible diode: 1S2075K or equivalent)
11
13
27
Motor power supply (�)
12
14
Motor power ON/OFF
*1
0.2ms max.
Timing signal
*2 8.0ms min.
T0
T1
T2
T3
T4
T5
T6
T7
T8
T9
T10 T11 T12
TS
T(0)
0.7ms max. 8 0.7ms max. 0.7ms max.
0.7ms max.
80.0ms min.
2.0ms min.
Character selective magnet No.n Ribbon shift magnet
(Print operation) (Normal paper feeding operation)
Typ. 285.7ms
Notes: 1. The signals in must be prepared by the user. 2. The pulse is indicated by a dot-dash line (*1) is generated for continuous printing. The next print cycle can start immediately after the leading edge of the timing signal Ts. 3. As shown by a dashed line (*2), the timing signal may go low at motor power-on or upon reception of a Print command. �9�